Monday, 23 September 2013

Extending a quilt

It's been a while since I have blogged so apologies are due. Looking back the last one was just before the schools broke up and there's my reason - I ceased to have control over my time and became full time taxi and food provider for indeterminate numbers of youth!
Still, they are all back at school and I have time to think and create and alter quilts. This was something of a challenge and not one which I had tackled before.
It involved an awful lot of unpicking as I had double top stitched the edging, nearly 50 feet in fact! Then I had to work out the logistics of extending the top, the wadding/batting and the backing and making it all appear that the final result had always been intended and did not look like an add on.
Luckily I had a large amount of a silvery olive coloured crushed velvet that I had used sparingly in the quilt. I also had a reasonable amount of a beautiful William Morris  print that co-ordinated perfectly and I could use to extend the backing and fold over to make a neat edge. I cut and hand tacked the velvet in place, about 25 feet and same with backing, another 25 feet of hand stitching. I then machine these seams, double stitching the velvet one for extra strength.
I then cut and pinned and hand stitched the wadding in place, hand tacked the new seam linking the velvet to the original quilt, 'stitched in the ditch' of this seam, and then carefully and painstakingly folded the backing over and pinned hand tacked and then hand stitched the edging in place. And just for good measure I ran a seam of machine stitching around the turned edge. Finished!!!
I think that because I am doing this for someone else and that they are paying for it, I was super cautious about each step, much more so than if I was just going to fling this on our bed.
Still I am really pleased with the result and hope that my client will be.

Sigh, a perfectly mitred corner about to be unpicked 
Unpicking both top stitched seams 
Yards of wadding cut and ready to be added  on
Key equipment - a large table, a sturdy sewing machine and an iron
Stitching in the ditch for added strength 
Newly mitred corner
And here's the finished result

Wednesday, 3 July 2013

Of cutting and breathing

Spent a lovely day at Ardington School of Craft yesterday. It's a great place with two beautifully appointed studios, lots of light and space, delicious food and generally a very nice place to spend a day getting creative.
The class was a sell out and apparently there's a waiting list for paper cutting so I shall be returning there before too long.
One of the things I love about teaching is never quite knowing what will be the outcome at the end of the day. Ten people who have never done it before, how are they going to tackle the challenge and what will they do with it? The variety of final pieces is always extraordinary and the students often amaze themselves with what they can achieve in a comparatively short time. There was much concentrating throughout the day, you could almost hear the paper being sliced and I had to remind them more than once to breathe and also to shake their hands out regularly, as there is a tendency to grip the scalpels rather tightly and you can quickly end up with the 'Swann Morton' logo embossed into your hand and an aching groove in you finger.
So pleased with the out comes and check out the great feedback on my 'comments' page

Do drop me a line if you would like me to visit you and a group who would enjoy learning this low cost but highly creative craft.

Starting to cut the final piece 

Checking on progress

Cutting challenging curves and swirls

Almost finished!

Checking the final cut against the design sheet

Beautifully cut alphabet

Very happy student

Delicate tree design

A technical approach to designing a sampler alphabet

Wednesday, 19 June 2013

Of rotary cutters and patchwork

Have just delivered a crash course in machine patchworking at the WI's Denman College. It's a lovely place to teach and Hope sets up the textiles room beautifully with all the equipment that my students will need and a laptop linked to a large screen, so that I show them useful and inspiring sites and links.
There were only three in the group which meant that they got lots of advice, top tips and hands on help from yours truly. Discovering the joy and ease of using a rotary cutter and quilting ruler is something of a transformative moment, both in terms of accuracy of cutting and also speed.
It was a very relaxed but highly productive course, which is the perfect combination, and the other course that was running in the teaching centre, commented on the amount of giggling and laughter coming from our room - and that's a good thing as far as I am concerned!
So here are some pics of what we got up to....

Gill made a cover for a large floor cushion/bean bag
that is going to be used in a children's library - lucky children!
Leanne with lovely bird motif cushion cover
Vicky's colour combinations are so fresh and summery
Careful pressing of seams is a key part of
machine patchwork

Getting to grips with newly acquired sewing machine
Table full of inspirational items

Thursday, 6 June 2013

Of quilts and the quilting process

So ArtWeeks has been and gone, I managed to finish my quilt and it attracted some lovely comments.
I am pleased with it and miss the making of it, the playing with fabrics, mixing and matching my eclectic finds, velvets with ticking and vintage linens with traditional Sanderson prints. I was going to say that that is the part of the creative process I enjoy most, but stopped myself because actually I love the whole design and make 'event'; the scribbled idea, the trawling through fabrics for the initial selection, the fine tuning of that choice, the cutting and stitching and assembly of the elements in to something new and original and beautiful. Then there's the final stages of backing and wadding and button quilting - not so creative more process but it finishes the quilt off and stops it from becoming an ongoing never to be completed assemblage.
So what next, I would like to do a blue themed one, but the idea of the dining room disappearing under fabric again is stalling me, meanwhile I think about it and it forms itself as a 'virtual' quilt somewhere in my mental ether  where it lurks until I raid my stash and resign myself to domestic quilting chaos once more.

The back showing the vintage Marks and Spencer sheet I found on Ebay,
love those fresh yellow and white stripes
Detail showing corner which I mitred properly and the
double rows of top stitching, one hidden in the seam between the edging
and the quilt and one half way between that seam and the edge 

Detail showing some of the different block designs and
fabric combinations, love the velvet with the Sanderson
Another detail
The finished piece, it covers the top of a king sized bed and
you can clearly see the five large squares that form the basis
for the design

Wednesday, 1 May 2013

Stitching for Artweeks

I am an Artweeks novice. It is something that I have thought about doing every time I visit other artists and crafters during this open studios/houses festival. I think, "I should do  this" but until now I haven't. And then late last year I asked the lady in our village, who has a lovely barn that  plays host to Artweeks exhibitions, whether I could put a show together, and she said yes. So then I called a couple of friends to see if they would be interested and it wasn't long before I had a group of six of us and we had the idea of calling ourselves 'Fragments' as we are fairly fragmented in our different specialities. It particularly suits me with my scrappy patchwork that I intended to show.
So here we are with just over a week to go before we open. I have put together twenty scrappy patchwork cushions, had a drama with sourcing the pads but hopefully have resolved that and am frantically quilting my long standing quilt that I started back in August  last year. I pushed the boat out and  bought new buttons to achieve the Japanesey/Victorian knotted buttons effect I favour.
Had a small panic that I should make more stuff this morning but am now over that and am occupied writing copy for 'Crafting at the Cottage' publicity fliers. It's so hard to write about your own work but must be done....may be I'll do some weeding whilst I think on . .

Check out our Facebook page to see how we are all doing
www.facebook.com/FragmentsArtweeksOxford2013?ref=hl

Not sure what you call a multitude of cushions, a squish? A cuddle?
But here 's a small sample of what I've been stitching  

Saturday, 6 April 2013

Paper cutting delight!

Yesterday saw my first workshop at Ardington School of Crafts which is a beautifully renovated Victorian village school on the out skirts of the picturesque village of Ardington.
There are two large well appointed studio spaces and a third room where refreshments are laid out.
I had a sell out class - and all my ladies were keen to make the most of their day. Started with my crash intro to the world of cut outs various and assorted, wood, metal, historic and international, the some resource sheets to practice with, and then onto the designing of their own panel.
What is always so interesting and rewarding for me is the breadth of creativity that surfaces in these workshops. Unless we put time aside in our busy schedules, we rarely get to sit down and focus on our own creativity, so when we do it's a luxury and we want to make the most of it, and my ladies excelled!

Latch on the door to the work room - has a satisfying clunk!
Beautiful detailed panelling painted in a gentle green
Sunlight streaming across the desks
Preliminary sketches for 'Artichoke'
'Artichoke' cut and looking like a menu heading
Initial sketch for 'Spring has sprung'
Developed sketch
Finished cut
Using windows as a natural light box
Ambitious 'Reflections' panel successfully completed
Stylish piece of 'Poetry'
Paper cut inspired by Haitian oil drum cut outs,
plus sketch for a second typographic panel
Lovely name panels

Tuesday, 26 March 2013

Selvedge Spring Fair

So after we had been bowled over at Somerset House with wonderful woolliness and fabulous photography, we caught a bus across London (the best way to travel across the city apart from walking!) and dropped into the Selvedge Spring Fair, a first for me and quite a treat.Apart from the lovely things on show it was a treat to meet the makers and designers.

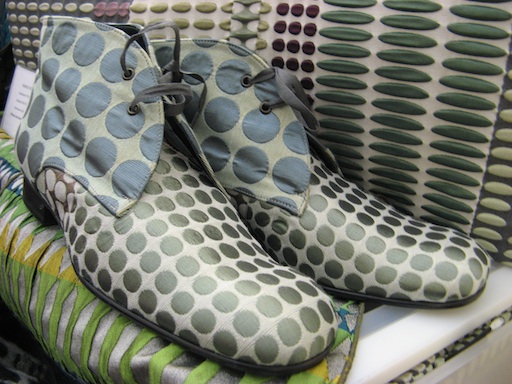
Exquisite shoes by Margo Selby
Charming creature by Threadbear Production
Beautiful vintage linens
Screen printed cushions
Felted bag on Josephine Ryan's stall
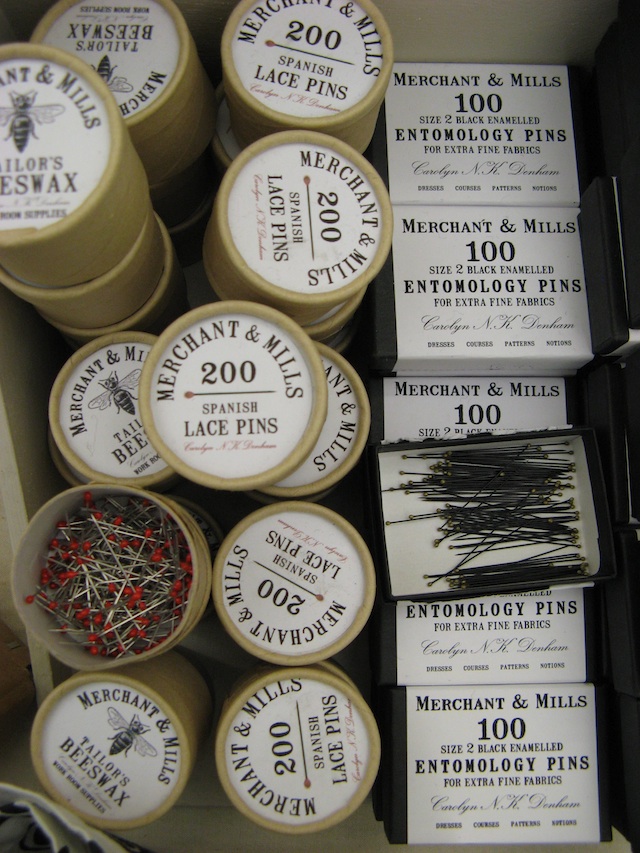
Love this packaging
The setting of Chelsea Town Hall
Tiny ceramic snail pots on Josephine Ryan's stand
Rob Ryan's Stall, sadly the man himself was not in evidence!
Fabulous shoe/tights combination
Tote bag made fro, vintage tea towels

Blog Archive